Showing posts with label paint. Show all posts

Wednesday, June 18, 2014

Patio floor paint job

A while back, I painted the pool deck.  Really, I guess you could say I "stained" the pool deck.  A friend recommended H&C Concrete stain because he had done a few pool areas with it.  My paint guy at Lowes' didn't have a better suggestion and they didn't carry the H&C water based satin, so I headed to the Sherwin Williams.   I got a color one shade darker than the house on the color swatch.  It was nice that SW would match any brand's color. I got two gallons, because each is supposed to cover about 200 square feet.  I had to go back for two more.  The old, battered cool deck really sucked up the paint.  Besides the fact that I totally miscalculated how much paint I would need, the stain turned out beautifully.  It's been over a year and I have no complaints. 
So....I decided to do the covered part of the patio as well.  Originally, we planned to put down slate tiles, but it's a pricey project and not in our budget right now. Ryder's 7th birthday is coming up and we are having a pool party here at the house.  Not only is the patio area hideous, but it gets super slippery with just my two kids.  The covered part was almost exactly 200 hundred square feet and smooth.  One gallon would definitely do the trick.  I still had my paint swatch with the pool deck color and after a quick comparison, I decided to get one shade darker.  There was hardly a difference between them and we have a really bad pollen season here.  I am hoping that it will help hid the yellowish dust a bit more.  Right, so now I have three shades of gray.  All Valspar paint colors: the house is Tornado watch, the pool deck is Artichoke and the patio is Empire.  I also had the guy add some non slip powder to the paint can.  So for $35, I completely freshened up the patio.  It's funny because depending on the way the light shines, they can all look the same or totally different.  It looks good, nice and neutral. 
Who knows what the flooring was before, but it looked like the previous owners did plan to do something.  What ever was there before had been cleared away and the concrete had been prepped.  You could still see the orange-reddish grout lines and swirls from what may have been glue.  My guess would be that at some point there was tile and at some other time maybe indoor/outdoor carpet, but that will be a mystery never solved.

Here are a few before and during shots of the painting process.
You can totally see what I mean.  What the heck do you think they had going on here?


What ever they had going on, I am grateful that I didn't have to scrape up glue and grout.  The paint went on smooth.  It was a bit porous, but nothing like the cool deck.  One can gave me two coats. 

So, so much better.  And it's not slippery anymore...added little bonus for the kids. 
I have to wait to put the furniture back.  And my mom mentioned seeing some cheap area rugs at Ross, so I may put one of those down, too.   Give the space a pop of color. We all know a rug can "really tie the room together, Dude."  I've spent almost every single day watching the kids in the pool since school let out, so why not make my area feel homey?!

Here's my entertainment...


Tuesday, March 19, 2013

A quick upcycle project

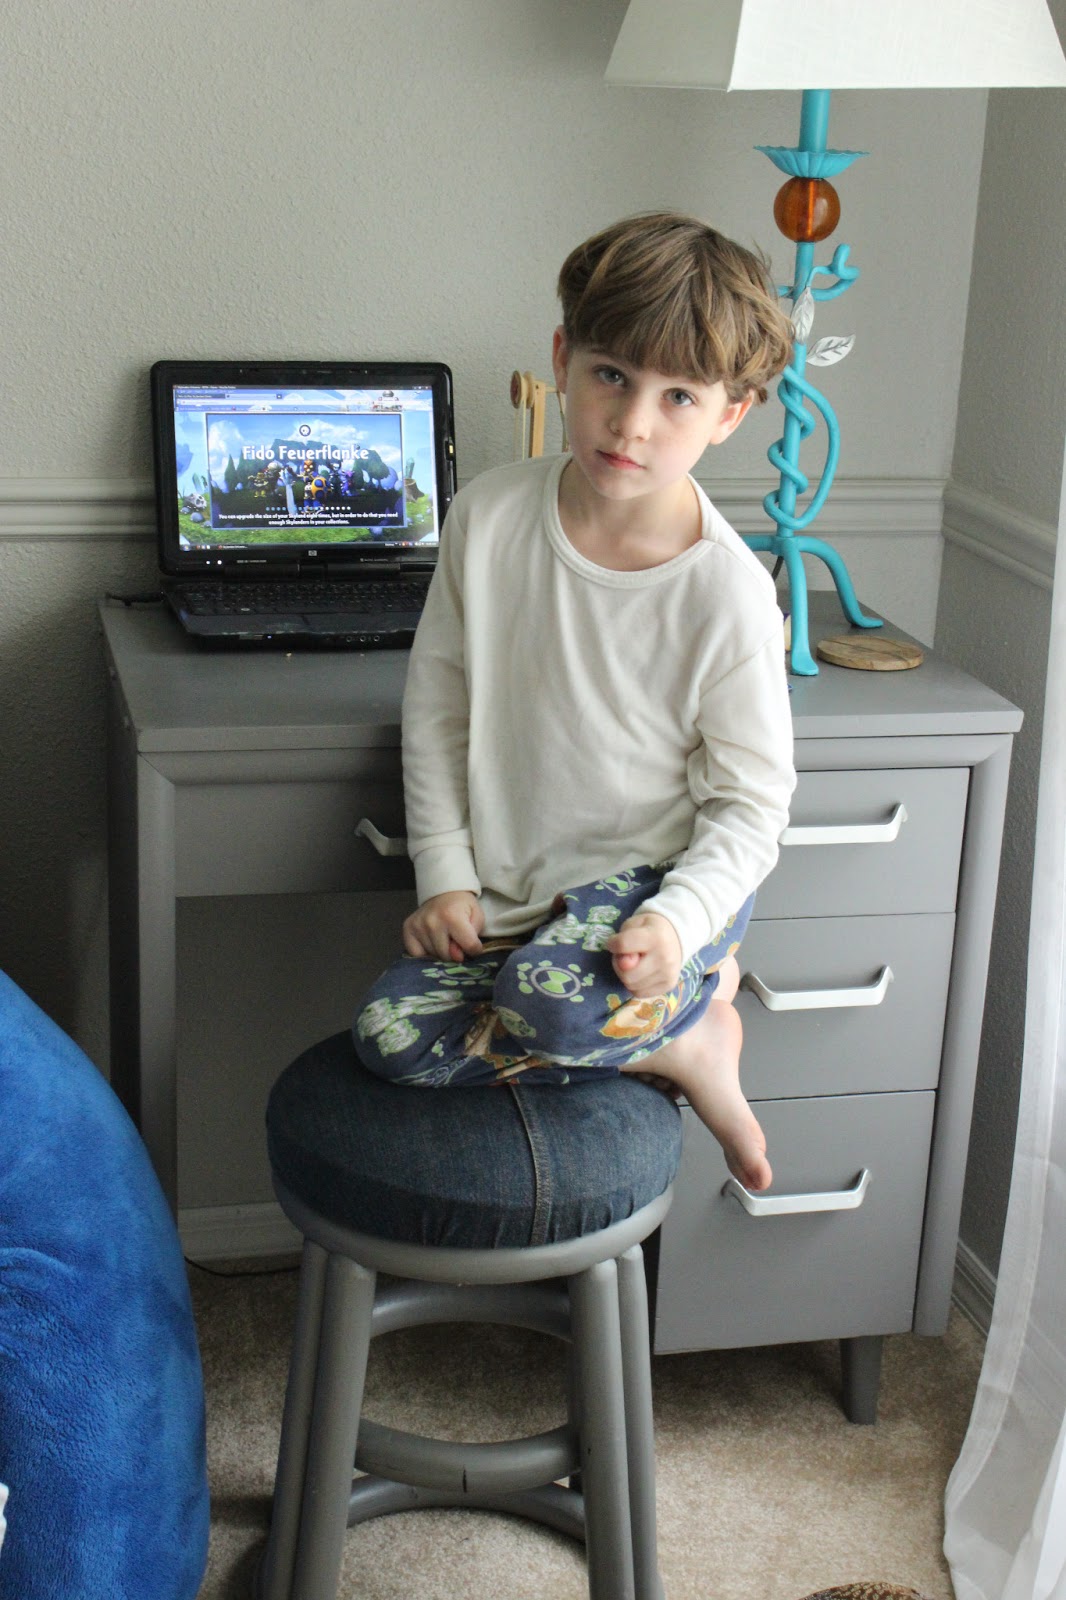
With the baby now totally mobile, our older son was having a hard time getting on the computer without little fingers trying to press, push or rip off the keys, mouse or screen.  This meant I was going to have to do a project....(yay!)
Conveniently, I had just purchased an old sewing machine desk at the thrift store for $15 AND had some gray paint in the garage waiting to bring new life to something!!
Sanding, priming and painting all went slowly, but smoothly.
I put the desk in place and it fit perfectly.  I grabbed our old computer chair out of the garage and........oopsie.....it doesn't fit under the leg space.  Not gonna work, now what?
I crossed my fingers and called my mother in law.  She had recently replaced her computer chair and I was hoping she still had the smaller wooden one.  I was in luck, she did.
Later that day, my husband grabbed one of the old beat up stools he used at his work bench in the garage and put it at the desk for a quick fix.
After staring at it, I realized it was perfect!  I could tuck it all the way under when it wasn't in use and it was less bulky that a chair with a back.
I had more paint from the desk, so all I needed was some fabric to cover the hideous, faded green pleather that was currently there.  My first option was just shy of enough to cover, so I went on the hunt.  I knew I had some left over outdoor fabric from years ago, that would be fine.  But, what I found instead would be much, much cooler. 
Old Jeans!
I split the inseam and it was just enough, not a millimeter to spare.  So perfect for a boys playroom stool!

Here is the Before....

 and After....
Cute, yet masculine, right?!  I totally love it!
My husband liked it so much, I did the other one too.  Now his work area in the garage looks cool, too.
There's the old sewing desk.  (Pardon the face, I took this pic on a day he was home sick)

Turned out pretty good, if I do say so myself.  Now, I'm looking all over the house to see if there is anything else I can cover in old jeans.
;)

Friday, April 27, 2012

Name Project


Ever since I did the domino letter project , my 4 year old wanted something for his room, too.
Well, we finally got around to creating something original just for him.

I had my eye on a piece of wood that my Hubs had in the garage for a while, I just had to think of what I could do with it.   A few elaborate ideas crossed my mind, but I knew I should keep it simple.  I usually fare better with the simple projects.
Paint is always fun and what could be easier than finger paint? There we go.  We will paint the wood.  Easy peasy..
The supplies I used to make this are:
finger and acrylic paints, a wood board (12x36in), paint brushes, painter's tape, a drop cloth, polyurethane and one kid.

Update: New house, new location


Tuesday, March 6, 2012

Family tree project

 A few months ago my mom gave me a frame she found at a thrift store.  It was nice and big and already had a matte.  But it had a generic picture of some golf scene...not cute.  I couldn't figure out what I was going to do with it so we painted a poster board with random brush strokes and just put it in there for something to do.   It was fine, something on the wall in the baby's room.
Then I had a great idea....inspired by Pinterest, of course.  

We are going to make a Family Tree Paining with our hand prints. 

It will be cute and original.
I was gonna find stuff around the house to create my idea. 
I get the picture down and pull out the make shift painting we already had in there.  
I decide I'm just gonna paint over it and use the sides for some pops of color.  
I had some gray sample paint from tests in the hallway and Ryder has tons of acrylic and finger paints for projects.  
Perfect.
First I brush on the tree base.  Easy enough.  
I paint my hand and stamp a few on.  Then Ryder, then Daddy...looking good.  
Time for the baby...hmmmmm. 
I'm thinking Daddy will hold him and I'll paint and stamp.
I quickly realize this is not be as simple as I had it going in my head.
Tyce's hand is small.  There is no way I'm going to be able to paint, flatten it out and stamp in without making a big smear mess.   hmmmmm.
The feet!  I'll do the feet!
Perfect!


For a little personalization, I wrote 'Family Tree' on the top and added our names on one of our prints, then put the year on the bottom.
Turned out to be fun art for the baby's room.  
And it was FREE!  Cool bonus.
His room now has three projects in it.  :)  Maybe he'll be inspired to be an artist.......

UPDATE:  Since we moved, I moved the Family tree to the bedroom, but it may end up in the playroom...
Here's some new shots for now.


Wednesday, January 11, 2012

My paint chip art project.

As of late..I have been really interested in the "paint chip" projects I've seen around the web.  This is my fav....http://lifecraftsandwhatever.blogspot.com/2011/01/paint-chip-wall-art.html. After reading this and a few similar crafts, I decided that I would try and tackle a small one. I have painted every room in my house at least once, not to mention a few pieces of furniture as well.
old 80's dresser painted for my 4 year old's room.  Blue is his favorite color and I needed the dresser he originally had for the baby's room...it matches the crib.  So this was pretty much a bribe.  I did a nightstand to match.

   From all the painting and testing I have tons of paint chips.  Also at one point I was  into taking close up pictures of flowers and nature, framing them and displaying them around the house.    (we had just moved in and I needed things on the wall STAT.)  They  were interesting, inexpensive and I always got compliments.  And because of this, I have tons of random frames.  Since we are having a baby boy....large bromeliads were not gonna cut it as far as wall art goes, so it only seemed right that I put something cooler and new in the frame.

Remember this is kind of a test run.  If I like it, I will be bold and take on the bigger project with many, many more paint chips, a more stable surface (like a wood board) and take my time with the first layer of glue.


First I laid the chips out on some thick card stock paper I had around the house to be sure I had enough.  Then I cut them to the appropriate size and glued them down.  I applied 2 coats of Mod Podge.  Since it's going to be behind some glass, I'm not quite as concerned with the finish being completely flat.
 For the last coat, I added a bit of brown acrylic paint to the glue and lightly brushed over it for some depth.

Paint chip art

 And there is the finished product.  Pretty good for a test run and much better for a baby boy's nursery. 
I have another 'wall art' project up my sleeve for his nursery and as soon as I get the supplies, I'll give you the step-by-step of that one too.  I have high expectations for it.  :)


<a href="http://pinterest.com/myryty/"><img src="http://passets-cdn.pinterest.com/images/pinterest-button.png" width="78" height="26" alt="Follow Me on Pinterest" /></a>