Showing posts with label upcycle. Show all posts

Tuesday, September 9, 2014

Refurbished, painted thrift store hutch DIY

Our house is not huge and while we've turned the would be "formal dining" into a playroom, somehow the kids stuff still seems to creep into ALL rooms of the home.
We've had a hand me down piano sitting between the entry way and the dining room for a while.  I was hoping one of he kids would develop an interest in it.  Plus when family offers furniture and such, I have a hard time saying No as there always seems to be a use for it.  In this case, not so much... No one plays, it just gets banged on A LOT!   Time for it to get shoved into the playroom and listed on the web.
I need more storage.
The dining room table is always riddled with crayons, loose leaf paper, coloring books, pencils, and all other school or craft related items.  I need a place for all this mess to go when not in use.
Ideal vision would be a mid-century modern credenza.  Ya know, the kind with the doors that slide across the front.  But, obviously, with that being the trend it's not easy to find that kind of thing anymore without a dealer already having jacked up the price at a "repurpose" thrift store.  I went on a hunt anyway.  I thought I found this cute 70's side board with accordion doors and sides that folded up to make more surface area, but when we got to the dealer it turns out it was that fake formica-like wood on top.  Nothing I could sand off and therefore useless.  I was feeling pretty bummed, but my mom insisted we stop at a few random Thrifts on the way home.  One was asking $4000 for a "Mad men" look-a-like dining table....uhhh....bee line for the door, this place is way outta budget.
Another had some cute stuff, but no credenzas or hutches.  (although there was a super cute chest of drawers that I wish I had a place for)
The last place was a Hospice Thrift.  They mostly had clothes and crock pots, but in the  corner were two tall pieces of furniture.  One a particle board entertainment stand, the other.....

This piece.
Full hutch.  Top and all.
What caught my eye was the hardware.  I really like that style of pull.  It was priced right at $60, but I wasn't sure I could bring it back to life.  Then these two ladies started eyeballing it, too.  At the same time I realized they were having a one day sale...25% off all furniture!  45 bucks..I'll take it!  we can figure out the details later.  :)
Since I didn't want the top part that houses plates and such, it's currently listed on Craigslist.  Hopefully I will be able to update this post with a "sold" comment and the expense would be even less.
Anyhoo.
We put it in the garage and I got to sanding the top.
From experience of painting other pieces, I knew it was in my best interest to NOT paint the top.  The two little boys of mine can quickly undo lots of hard work.
Deciding on a color was pretty easy.  My mom had a bunch of swatches from an end table she had been debating color on.   I loved one of them called Royal Palm by Olympic.  I knew that was going to be the one.
Here's a look after sanding lots of old varnish off the top and a coat of primer for the bottom.  It already looks 1,000 times better.

Again, boys.  So I wanted to go for a kind of distressed look on the top.  I had a bit of gray wood stain, so I put a little and almost immediately wiped it.  I didn't want it to penetrate too much, just give a bit of a whitewash look.
Just a note: If you look close at the drawers you can see that the cool handles I fell for are not the original hardware.  The three middle drawers have an extra hole drilled where the new ones need to fit.  That worked out well...saved even more not having to go buy updated pulls or a can of spray paint. 
Here it is partially painted with one coat of polyurethane on the top.
The first coat never goes on perfect.  I hate having to wait overnight, re-sand and apply more, but it's definitely worth it in the long run.  I used clear satin for the poly finish. 

And here's the finished product


I'm super happy with the way it turned out.
And as soon as the paint is all cured all this...
Will be neatly tucked away in this.....

So for a grand total of $55 ($45 for the hutch add just over $10 for a sample jar of paint ((sings "Sample in a Jar" for my phellow Phish heads)) and small can of polyurethane) I have an awesome new buffet to greet anyone who comes through the front door. Sweet!
Gotta love those thrifty finds.

Bonus: 
A few days later my mom found a cute little end table for $5!!
I used the leftover paint and poly from this project to spruce it up.
Sanding off the top and drawer revealed a cool distressed look that I couldn't have created if I tried, so I left it.  The top even had an old, barely noticeable drink ring and what seem to be burn marks for added character.
Cool!

Saturday, September 28, 2013

DIY: End tables from old to new

          We have been living in our new house for over a year now.  There were a few pieces of furniture that we borrowed from my parents and it was time to give them back.  (They got another house) So it was time to hit the thrift stores and/or internet.  I had been perusing Craigslist for an octagon end table.  I have really been wanting one.  I like the shape and storage, plus I knew one of those seventies styles from your grandparents house and/or college apartment would look really cool with a fresh coat of bright paint.
         My mom was at the Habitat for Humanity and texted me a picture of a round table similar to the octagon style.  I headed up there to see it for myself.  It was the perfect height and size.  The price tag was $25 and they were having a 40% off sale on furniture that day.  No brainer....

I had already sanded the top when I realized I hadn't taken a picture....oops.

I've painted quite a few pieces of furniture and my mom has painted a ton.  What I've learned, is that unless you are going to apply a polyurethane, the top is going to chip, get scrapped or rub off.  If it is something that is going to get a lot of wear and tear staying with the wood is best.  Plus, my hubs sometimes can't cope with painting over beautiful wood.  In this case I didn't think the wood was beautiful, but the end table gets constant use.  Living with all boys, I can't have a piece of furniture that I have to say,  "don't bang the bat/club/stick/book/cup/car/superhero/rolling pin..... on there."   It has to be able to handle everything.  Luckily, when I sanded the top I really liked the wood grain.  (Maple, I think)
Since I was going to paint the bottom, it is much easier to apply a liquid deglosser than sand.  After that was prepped, I put a coat of primer.


The previous owners of the house before this one had left an end table.  We had it shoved in a closet and basically used it for shelving.  But, since I was already prepping and painting I decided to go ahead and do that table too.

Both pieces are nice and while some may get upset that I am painting and not staining, we are not very traditional.  We like a little color and unique pieces.
This is how they turned out.


It's called Caribbean Holiday by Olympic.   While gray would have been the more "modern" choice, our walls are gray and the carpet is beige.  We wanted something that would stand out, not blend in.   Wwe have turquoise as our accent color around the house, I thought something in the teal family would be cool.  I really love them!  The poly on the top of this one is a gloss, because it get some hard core wear and tear.  The handles are the original, spray painted, of course.   I left the rim of the dark wood, because I thought it was interesting and because the other table had a darker wood.

Not too shabby, eh?

I have two other projects in the works...
One is converting an old coffee table into an ottoman.  (had to enlist the hubs to help with that because it involves a big power tool)
The other is another end table for the baby's room.
The ottoman is coming along.  We have painted the legs and shortened it six inches.....
The end table hasn't been touched yet....can't decide what to do...
It's called a campaign table and has quite a notable brand.  I would like to keep it the way it is, unfortunately it has seen far too much wear to save.  There is a piece of the veneer that needs to be glued back on the side and a ton of scratches on the top.  But for 9 bucks, I couldn't leave it there.  :)
Hopefully I will have the updates soon, but for now we are headed to a birthday party.  Our fourth weekend in a row for birthday parties.  September was a big birthing month for the 1st grade parents.  :)

Tuesday, March 19, 2013

A quick upcycle project

With the baby now totally mobile, our older son was having a hard time getting on the computer without little fingers trying to press, push or rip off the keys, mouse or screen.  This meant I was going to have to do a project....(yay!)
Conveniently, I had just purchased an old sewing machine desk at the thrift store for $15 AND had some gray paint in the garage waiting to bring new life to something!!
Sanding, priming and painting all went slowly, but smoothly.
I put the desk in place and it fit perfectly.  I grabbed our old computer chair out of the garage and........oopsie.....it doesn't fit under the leg space.  Not gonna work, now what?
I crossed my fingers and called my mother in law.  She had recently replaced her computer chair and I was hoping she still had the smaller wooden one.  I was in luck, she did.
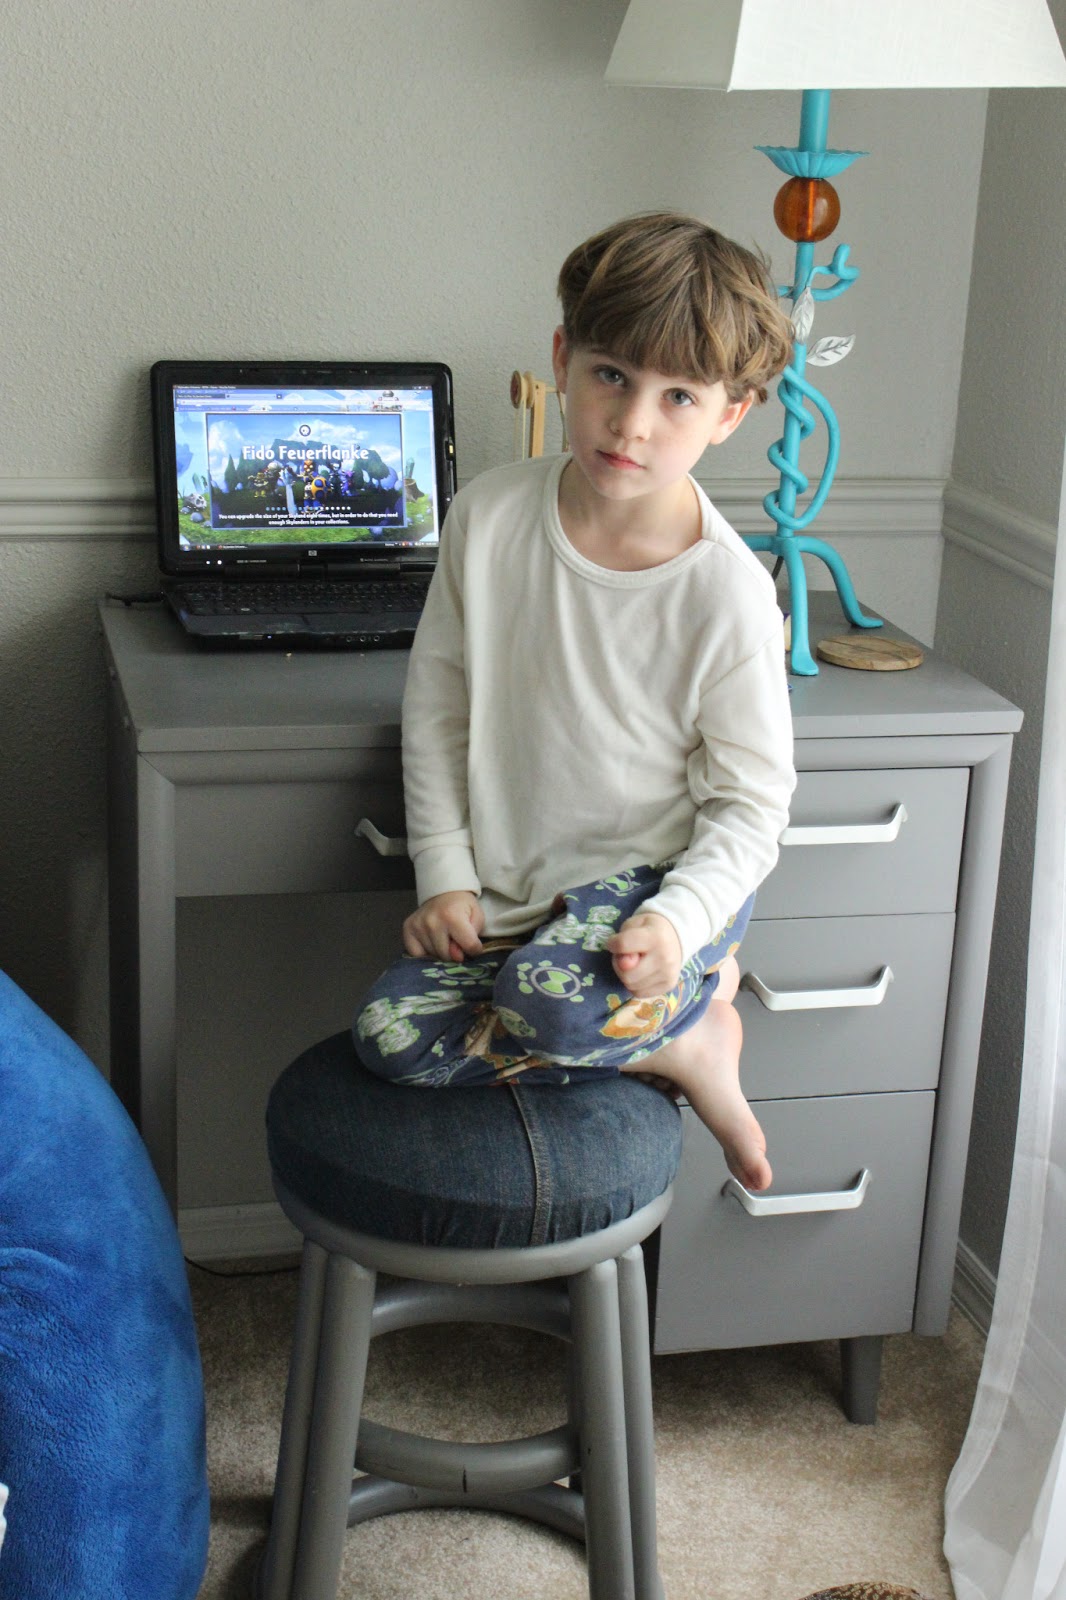
Later that day, my husband grabbed one of the old beat up stools he used at his work bench in the garage and put it at the desk for a quick fix.
After staring at it, I realized it was perfect!  I could tuck it all the way under when it wasn't in use and it was less bulky that a chair with a back.
I had more paint from the desk, so all I needed was some fabric to cover the hideous, faded green pleather that was currently there.  My first option was just shy of enough to cover, so I went on the hunt.  I knew I had some left over outdoor fabric from years ago, that would be fine.  But, what I found instead would be much, much cooler. 
Old Jeans!
I split the inseam and it was just enough, not a millimeter to spare.  So perfect for a boys playroom stool!

Here is the Before....

 and After....
Cute, yet masculine, right?!  I totally love it!
My husband liked it so much, I did the other one too.  Now his work area in the garage looks cool, too.
There's the old sewing desk.  (Pardon the face, I took this pic on a day he was home sick)

Turned out pretty good, if I do say so myself.  Now, I'm looking all over the house to see if there is anything else I can cover in old jeans.
;)